





About GridMod
From Steam WorkshopMouse behavior (important) Left-click will always paint tiles and paste blueprints while paint or blueprint placement is active. Right-click deletes paint, exits selection, and cancels blueprint…
Mouse behavior (important) Left-click will always paint tiles and paste blueprints while paint or blueprint placement is active. Right-click deletes paint, exits selection, and cancels blueprint placement. If you feel like you can’t attack or place items, make sure you’ve exited selection mode or blueprint placement – those modes temporarily disable attacking and normal placement so they don’t interfere with painting or blueprint stamping.
detailed controls: https://github.com/cr-2-4/necesse-Gridmod/blob/main/docs/controls.md
GridMod Workshop Description
GridMod is a QoL overlay that makes Necesse's construction and settlement tools feel like a proper level editor. It adds a clean grid, chunk indicators, settlement bounds, and a full paint/blueprint workflow entirely client-side, so you can lay out floors, walls, roads, and decorations with confidence before committing to the world.
Recommended keybinds
I strongly recommend binding at least these controls in the Controls → Mods → GridMod section:
- Open Grid UI – opens the main configuration window. - Toggle Grid – show/hide the base grid overlay. - Paint: Toggle – turn paint logic on/off. - Paint: Clear – clear all paint for the current world. - Paint: Toggle overlay – hide/show the paint layer visually without disabling it.
You can bind more later (blueprint hotkeys, settlement tools), but those five make the mod feel good right away.
What you can do
Grid overlay
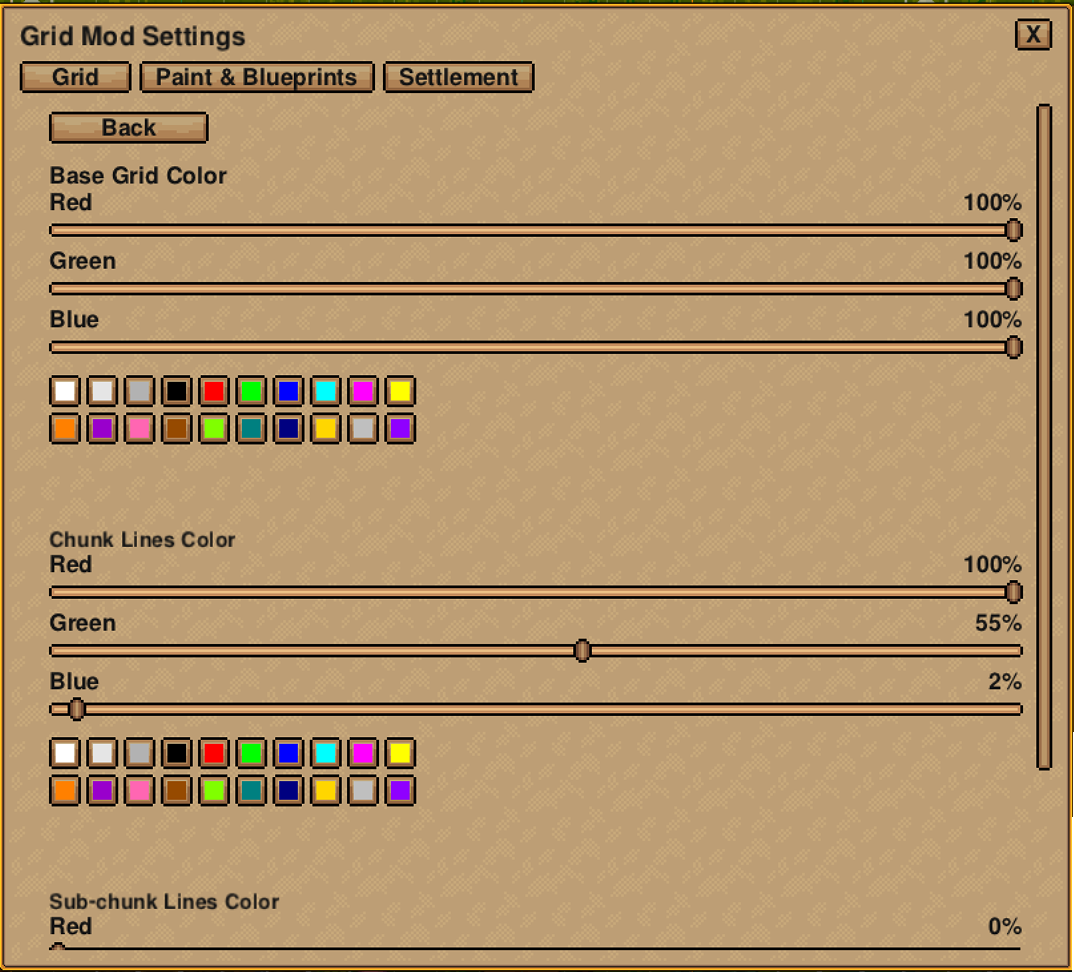
- Toggle a tile grid on top of the world. - Optionally show chunk and sub-chunk lines (with span/alpha controls). - Adjust grid and chunk opacity from the Grid UI or via hotkeys.
Paint overlay
- Turn paint logic on/off (Paint: Toggle) without touching your saved data. - Show/hide the paint overlay (Paint: Toggle overlay) while still painting “blind” if you want. - Pick a paint category (floors, walls, doors, lighting, furniture, etc.) in the Grid UI or the quick palette. - Every paint stroke lives on one of three layers (bottom, middle, top) so you can stack walls over floors or add detail passes without erasing your base layout. Switch layers from the quick palette while painting, and use the selection layer dropdown to isolate, copy, or clear individual layers. Lower layers remain visible underneath higher ones, so you can rough-in roads, then overlay walls, then sprinkle props without touching earlier work. - Adjust brush size (1–32) and see a preview square before placing tiles. - Hold Paint: Erase (hold) or use right-click to erase instead of paint. - Change per-category colors (grid lines, paint, selection, blueprint ghost) in the color tabs of the Grid UI.
Selection tools
- Switch between selection modes in the Grid UI: - None – selection disabled. - Rect – click-drag a rectangle of painted tiles. - Edge – freehand stroke; selects tiles along the path. - Edge+Fill – stroke + fills the enclosed polygon. - All – select all painted tiles. - Choose a selection layer (bottom/middle/wall/top) so only matching layers light up: - Top layer selection includes wall attachments and wall lighting. - Selected tiles glow with the same highlight style as hover, so you can see exactly what will move or be affected.
Blueprints
GridMod separates three blueprint types and exposes them through the quick palette sidebar:
- Relative blueprints (per save) - Blueprints are created from the current selection, not from the entire overlay. - In the Blueprints panel, use: - Selection layer and Selection mode (Rect / Edge / Edge+Fill / All) to decide which tiles are included. - Save (dbl-click) to overwrite the currently selected blueprint with your selection (with a two-click overwrite guard). - Save As to create a new blueprint from the current selection (or overwrite an existing name, also with a two-click guard). - Load a blueprint to get a moveable ghost you can rotate/flip and stamp into the world. - Rename, delete, and manage your blueprints in the quick palette “Blueprints” panel.
- Global blueprints - Use the “Global BPs” panel in the quick palette to store layouts that are not tied to a particular world. - Create new global entries, save the current paint into them, reload them later, and delete them when no longer needed.
- Default blueprints (read-only pack) - The Default blueprints dropdown exposes curated .gridpaint templates like the Guidehouse and Crafting outline. - Typical use: - Pick a default from the dropdown. - Hit Load default to place it directly as a ghost in the world. - Defaults live inside the mod’s jar, so they never show up in your user blueprint folder and can’t be accidentally deleted or renamed.
Blueprint placement works just like normal paint placement: - Use the quick palette buttons or blueprint hotkeys to Rotate CW / Rotate CCW / Flip while the ghost is active. - Left-click stamps the transformed blueprint into the world; right-click cancels placement.
Settlement helpers
- Toggle a settlement bounds overlay that shows the current tier size as a configurable rectangle. - Snap the settlement center to your current tile, preview the bounds, and adjust tier sizes in the Grid UI.
Quick start
1. Bind keys for Open Grid UI, Toggle Grid, Paint: Toggle, Paint: Clear, and Paint: Toggle overlay. 2. Toggle the grid or paint: - Turning Grid on spawns the quick palette panels for Grid and Global BPs. - Turning Paint on adds the Paint, Blueprints, and Settlement panels. Then open the quick palette button on the left side of the screen and expand the panels you need. 3. Turn on Paint: Toggle and pick a paint category (for example Floors) and brush size. 4. Draw a simple layout, then use the Selection layer / Selection mode controls and Save / Save As in the Blueprint panel to store it as a blueprint.
Highlights
From source dataFootprint
A 718 KB download, rated a light load on a server.
Last update
Its author last shipped an update 11 mo ago.
GridMod on Nxeon
From our catalogue- One-click install
- Supported on Nxeon Necesse servers. We download it from Steam Workshop, place it, and restart the server.
- Server load
- light
- Smallest plan we suggest
- Necesse — 1 GB (1 GB RAM). This follows our own load rating above, not a benchmark.
- Latest build
- 2025-11-15, released 2025-11-15, 718 KB
Game versions by loader
| Loader | Game versions | Newest |
|---|---|---|
| Workshop |
From 1 recorded build of GridMod.
Run GridMod on a Necesse server
Pick a server or deploy a new one above; it is installed in one click.
What kind of mod it is
From the catalogWorkshop
Its source category doesn’t say more about what it does, so NxLabs lists it under Other.
Compatibility
- Game
- Necesse
- File size
- 718 KB
Verified at the source
- ✓Steam WorkshopOfficial listing, checked 2026-10-10Open ↗
- ✓AuthorCr-2-4, as published on Steam Workshop
- ✓LicenseNot published by the sourceFree