





About MD - Mining Rig
From Steam WorkshopLore Midnight's Yoko Mining Rigs are advanced industrial machines. What used to be kept hidden deep in Midnight's territory they are now being acquired by allies due to a low supply in the ore…
Lore
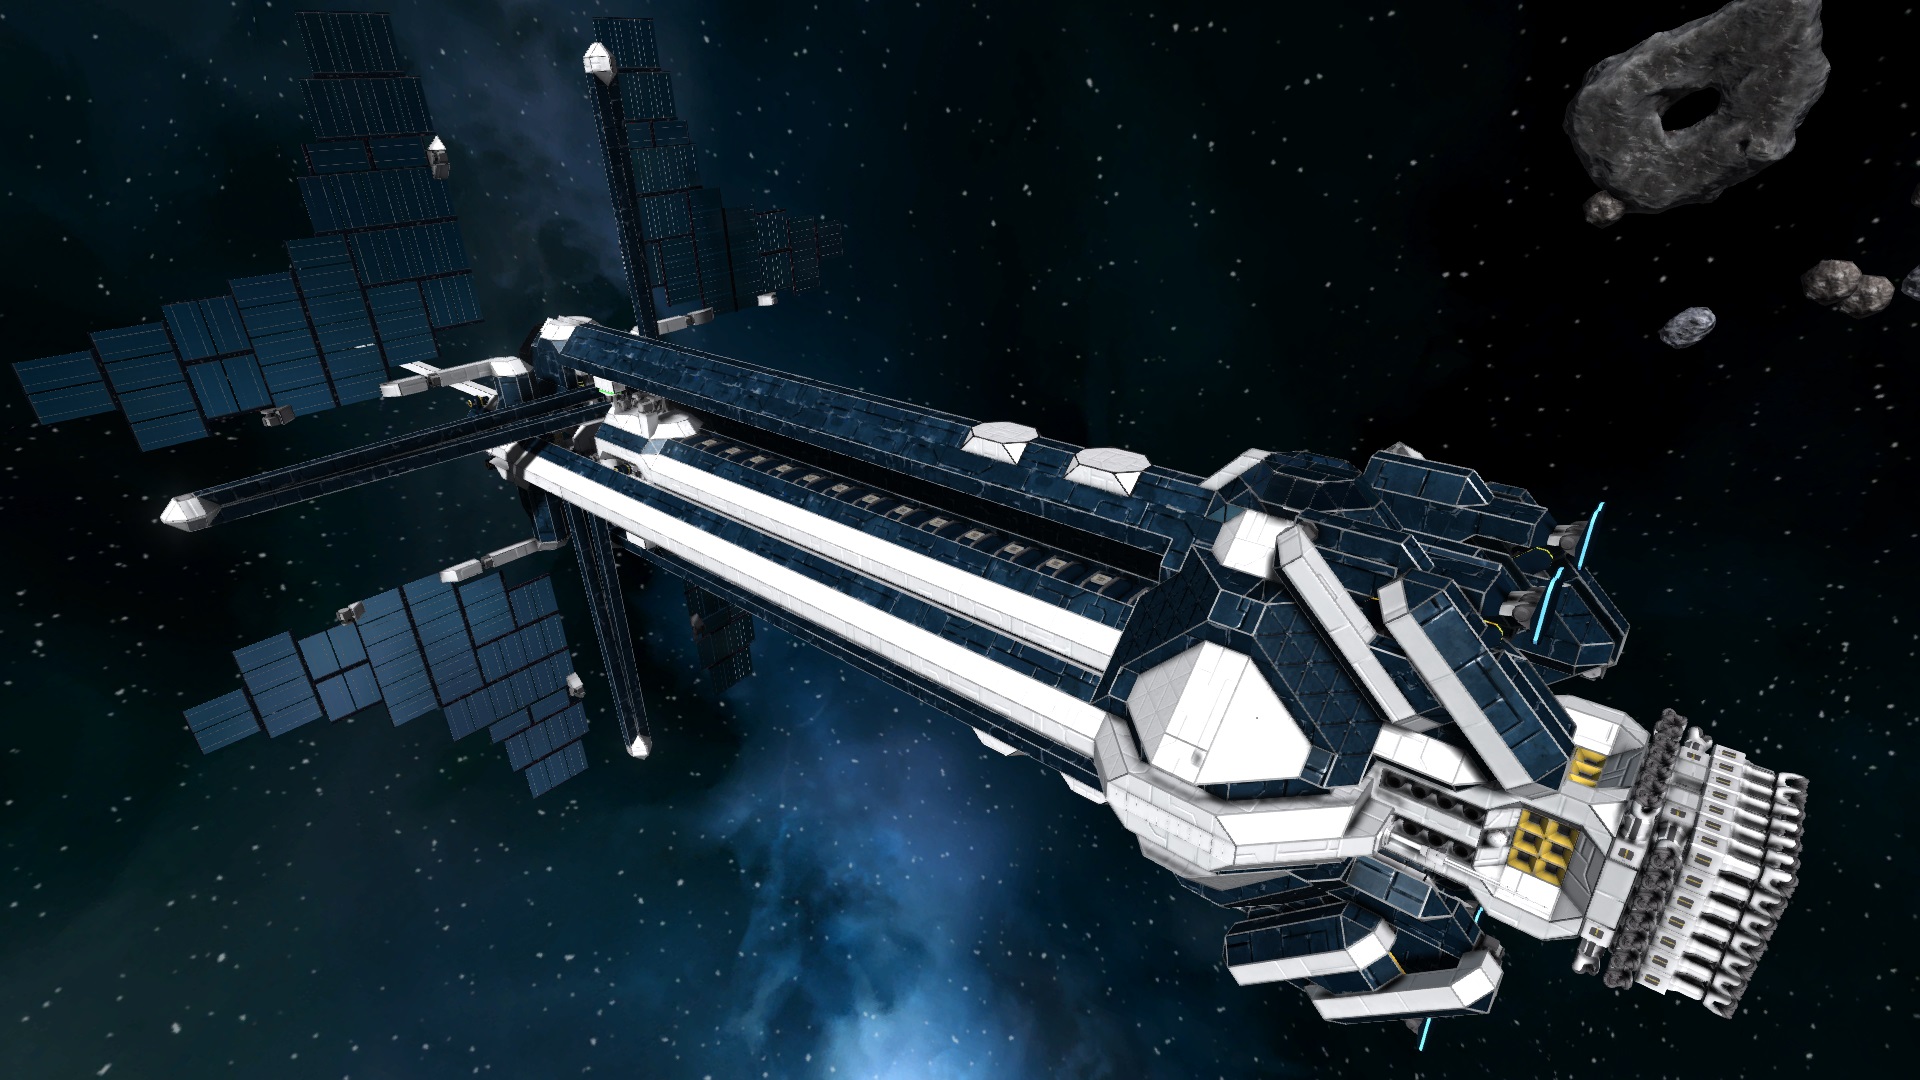
Midnight's Yoko Mining Rigs are advanced industrial machines. What used to be kept hidden deep in Midnight's territory they are now being acquired by allies due to a low supply in the ore market. Reliable with low maintenance and almost fail proof. It runs on renewable solar energy and the automatic resetting allows it to feast on asteroid fields constantly.
Stats
Hull Class: Mobile Platform Mass: ~6,250,000 kg Storage: 40 large, 2 small containers Length: 380m Width: 172.5m Height: 167.5m Forward Acceleration: 1.15 m/s² Reverse Acceleration: 0.77 m/s² Other Acceleration: 0.58 m/s² Power: 21.12 MW Solar, 72 MW Batteries Gyroscopes: 33 Thrusters: 22 large, 32 small Armament: 4 Gatling Turrets Aircraft Capacity: 4 Utility: 77 Drills, 1 Refinery, 1 Assembler Imgur Link: http://imgur.com/a/MENA1
Yoko Control Guide
Landing Arms (Page 1)  1 - Switch Direction of all 4 feet 2 - Top Left Arm Unlock 3- Top Left Arm Lock 4 - Top Right Arm Unlock 5 - Top Right Arm Lock 6 - Bottom Left Arm Unlock 7 - Bottom Left Arm Lock 8 - Bottom Right Arm Unlock 9 - Bottom Right Arm Lock
A whole page is dedicated to grab asteroids. You can move multiple arms at once or individually. All arms are linked with the direction switch but with 3 locked and 1 unlocked it only needs to take the space of one button. Start with the Top Left arm. Unlock it by pressing 2 and watch it extend. If it is not extending then hit 1. Allow it to extend till it can grab the asteroid and then hit 3. This will lock the arm and secure your footing with this arm. This can be repeated with each arm using the 4 and 5 for top right arm, 6 and 7 for the bottom left arm and 8 and 9 for the bottom right. To release and retract all arms you can hit 1 and then hit 2, 4, 6, and 8.
Solar Panels (Page 2)  1 - Base Solar Array Hinge 2 - Inner Tip Solar Array Hinge 3 - Outer Tip Solar Array Hinge 4 - Pivot Landing gear 5- Both Sides Pivot Reverse Motion 6 - Left Side Pivot Reverse Motion 7 - Right Side Pivot Reverse Motion
Same as landing gear the solar panels get their own page as well. Opening procedure is hit 3 to fold out the outer tips. Wait a few seconds and then hit 2 to open the inner tips of the solar array. Once those are flat then hit 1 to make the (X) shape into a (II) shape. Now you are ready to blossom the array and to do that hit 5. If nothing is happening then hit 6 to unlock. Wait till both sides are parallel with each other (90 degrees with the vessel) and hit 6 to stop. Now hit either 6 or 7 and then hit 6 again. Both sides should be facing the same direction as they move now. To fold back up it is basically reversed but with the folding part you want to make sure it makes an X before you fold in the inner (button 2) and then outer (button 3) panels.
Drill Bit Controls (Page 3)  1 - Drills on/off 2 - Turing on/off the Gyros and Thrusters of the Drill Bit 3- Switching Direction of the Drill Bit Motion 4 - Drill landing Gear Unlock 5 - Drill Landing Gear Lock 6 - Drill Landing Rotor Reverse
3rd page is for the drill bit. First to begin we need to unlock it from the rest of the vessel by hiting 4 and then 6. After that you want to turn on the drill by pressing 1 and 2. Lastly 3 to begin the moving of the drill bit and bore a hole in the asteroid. At any time button 3 can be hit to reverse the direction of the drill bit sooner than a full extend. Helpful when it already dug though an asteroid before even reaching full length. After drilling a hole we first want to turn it off by hitting 1 and 2. Then lock it by hitting 6 to rotate the locking arms in a moment and then hit 5 to lock.
Conveyer Access (Page 4)  1 - Piston Extend 2 - Lock connector (pressing P can also work)
With the drill back at a starting position and bit is locked securely you want to access the goods at one of the docking in the back.
Notes
Since the game changes on a weekly basis things may not work as intended. Last updated 12/27/2014
Highlights
From source dataFootprint
Rated a light load on a server.
Last update
Its author last shipped an update 12 yr ago.
MD - Mining Rig on Nxeon
From our catalogue- One-click install
- Not available. One-click install isn't available for this game's mods yet. Download it and upload it to your server in Files.
- Server load
- light
- Smallest plan we suggest
- Space Engineers — 8 GB (8 GB RAM). This follows our own load rating above, not a benchmark.
- Latest build
- 2014-12-28, released 2014-12-28
Game versions by loader
| Loader | Game versions | Newest |
|---|---|---|
| Workshop |
From 1 recorded build of MD - Mining Rig.
Run MD - Mining Rig on a Space Engineers server
Deploy a server above, then upload the file in Files.
What kind of mod it is
From the catalogTechnology & automation
Machines, power, logistics and automation.
Compatibility
- Game
- Space Engineers
Verified at the source
- ✓Steam WorkshopOfficial listing, checked 2026-11-01Open ↗
- ✓AuthorRavric, as published on Steam Workshop
- ✓LicenseNot published by the sourceFree