




About Y.A.P.H.R (Yet another Piston, Hinge, and Rotor) control script.
From Steam WorkshopAre you tired of jerky hinges, twitchy rotors, and clanging pistons? Are you tired of weird and unintuitive configurations and setups? Are you tired of recompiling after every little change?…
Are you tired of jerky hinges, twitchy rotors, and clanging pistons? Are you tired of weird and unintuitive configurations and setups? Are you tired of recompiling after every little change?
Y.A.P.H.R is here to help!
Now with support for Profiles!!!
23.9.2025 - This is significantly improved version. Server friendly.
Initial setup
[olist] [*]Setup all of the blocks comprising the crane in "{Yaphr} Crane" group. The script will put configuration in the programmable block CustomData. [*]Add the "{Yaphr}" tag to your screen/cockpit. It can be put either in the name or in CustomData, the script will check both. This is only necessary for the script to show its menu. For cockpits multi screens put "@1-n" to the cockpit CustomData. Example "@1" first screen, "@2" second and so on. You can even combine the tag and the screen index like this "{Yaphr}@2". [*]Load the script into your Programmable Block and bind the "up"/"down"/"apply" commands to your bar (just like PAM). [*]As soon as the menu shows on the configured screen you'r good to go. [/olist]
Crane control
==================================
> Configuration >
  Profile: default
  Mode: off
  Park
  Work
  Set Park position
  Set Work position
----------------------------------
Up/Down - navigate. Apply - go into the submenus
After this step you can either go to your Programmable block CustomData and configure it manually there...
[default/Pistons]
Pitch=0
Yaw=0
Roll=0
Left/Right=0
Up/Down=1
Forward/Backward=0
Tuning=0/15/0/2
Work=15/15/0/2/1.146432
Park=15/15/0/2/0

[default/Hinges]
Pitch=0
Yaw=0
Roll=0
Left/Right=6
Up/Down=0
Forward/Backward=0
Tuning=0/15/0/2
Work=15/15/0/2/0.7228416
Park=15/15/0/2/-1.570478

[default/Base Rotor]
Pitch=0
Yaw=2
Roll=0
Left/Right=0
Up/Down=0
Forward/Backward=0
Tuning=0/10/0/2
Work=15/10/0/2/3.921732
Park=15/10/0/2/0.01286066

[default/Base Hinge]
Pitch=1
Yaw=0
Roll=0
Left/Right=0
Up/Down=0
Forward/Backward=0
Tuning=0/15/0/1
Work=15/15/0/1/0.7258998
Park=15/15/0/1/1.570796
... or go "Back" and enter the "PID Controls" menu.
Configuration
====================
  < Back
> Pistons >
  Hinges >
  Hand >
  Base Rotor >
  Base Hinge >
----------------------------------
All of the blocks in the "{Yaphr} Crane" group are here. Go and configure how you want to control them.
Pistons
==================================
  < Back
  Save                      -------> Save the current configuration.
  Align To: None            -------> Set automatic align to a direction relative to the base rotor
> Control input: Up/Down    -------> "apply" to enter edit mode. "up"/"down" PB commands to change value.
  Control gain: 1           -------> Speed or mouse gain.
  Step: 1 / 1               -------> Amount to inc/dec the last four values.
  Kp: 0
  Ki: 15
  Kd: 0
  Decay: 2
----------------------------------
The last four values are respectively the Proportional Term, Integral Term, and Derivative Term of the PID controller responsible for the particular block. The "Decay" term is a simple decay mechanism I added for the Integral. If you don't know what these terms mean or anything about PID controllers fot that matter, don't worry. Just play with the values and see what happens. For starters use the values set by default by the script. They are tuned so that there is just enough delay to compensate for inertia which is especially useful for making mouse control buttery smooth.
After that set the "toggle" command on your toolbar to be able to turn the scrip on/off and you should be good to go.
The script also supports automatic movement to preset "Park" and "Work" position. To use this feature, manually move the crane to the desired position and run either the "set_park" or "set_work" command. Put the "work" and "park" commands on your toolbar and the crane will automatically move to either position.
The Profile functionality is kind of self explanatory. You can create multiple profiles. This can be helpful for example if you like to set up different speed modes and switch for finer control. Personally I use it to control multiple cranes on a single grid. Under the hood it's rather simple. The script just creates multiple sections in the PB CustomData prefixed with the respective profile name.
The script supports the following commands: [table] [tr] [th]Command[/th] [th]Description[/th] [/tr] [tr] [td]"toggle"[/td] [td]on/off[/td] [/tr] [tr] [td]"align"[/td] [td]Set align mode on/off. This is going to align the configured blocks to the pre-configured direction relative to the base rotor[/td] [/tr] [tr] [td]"work"[/td] [td]Switch to go to "work" mode[/td] [/tr] [tr] [td]"park"[/td] [td]Switch to go to "park" mode[/td] [/tr] [tr] [td]"set_park"[/td] [td]Sets the "park" position[/td] [/tr] [tr] [td]"set_work"[/td] [td]Sets the "work" position[/td] [/tr] [tr] [td]"up"/"down"/"apply"[/td] [td]Navigate the menu system.[/td] [/tr] [tr] [td]add [profile_name][/td] [td]Add profile with name [profile_name] (Case sensitive. Does not switch automatically to the new profile).[/td] [/tr] [tr] [td]set [profile_name][/td] [td]Switches to [profile_name][/td] [/tr] [/table]
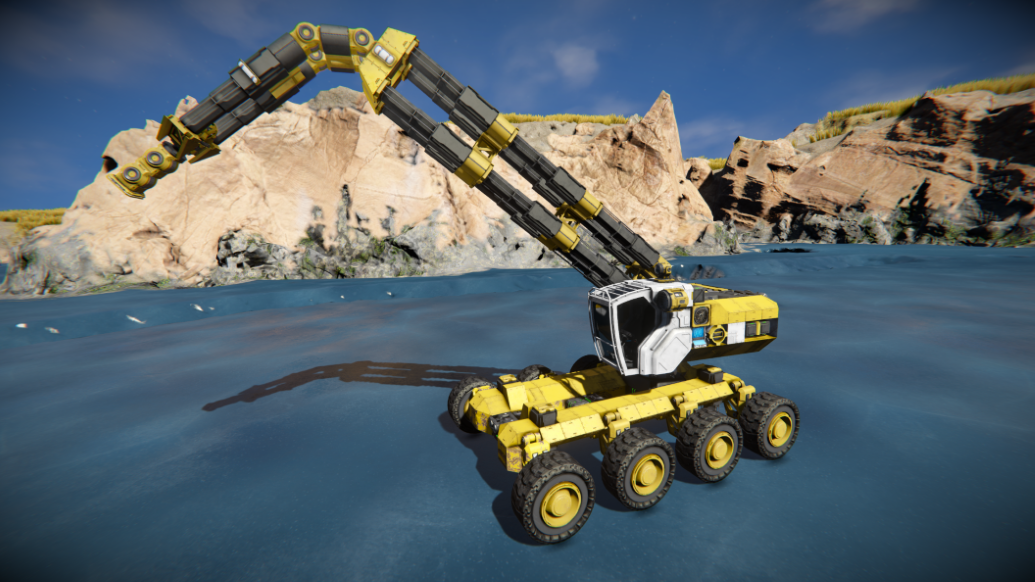
Small crane to demonstrate the script:
https://steamcommunity.com/sharedfiles/filedetails/?id=3588778336
The source code for this script is here https://github.com/Dontar/space-engineers-yaphr
Shout out to malware-dev for the great article on PID controllers. (He is the author of the current version of the Programmable Block in Space Engineers)
Cheers and enjoy and Let Clang be merciful to you.
Highlights
From source dataFootprint
Rated a light load on a server.
Last update
Its author last shipped an update 9d ago.
Y.A.P.H.R (Yet another Piston, Hinge, and Rotor) control script. on Nxeon
From our catalogue- One-click install
- Not available. One-click install isn't available for this game's mods yet. Download it and upload it to your server in Files.
- Server load
- light
- Smallest plan we suggest
- Space Engineers — 8 GB (8 GB RAM). This follows our own load rating above, not a benchmark.
- Latest build
- 2026-10-26, released 2026-10-26
Game versions by loader
| Loader | Game versions | Newest |
|---|---|---|
| Workshop |
From 1 recorded build of Y.A.P.H.R (Yet another Piston, Hinge, and Rotor) control script..
Run Y.A.P.H.R (Yet another Piston, Hinge, and Rotor) control script. on a Space Engineers server
Deploy a server above, then upload the file in Files.
What kind of mod it is
From the catalogTechnology & automation
Machines, power, logistics and automation.
Compatibility
- Game
- Space Engineers
Verified at the source
- ✓Steam WorkshopOfficial listing, checked 2026-11-03Open ↗
- ✓AuthorDontar, as published on Steam Workshop
- ✓LicenseNot published by the sourceFree